Showing posts with label home decor. Show all posts

Tuesday, August 11, 2015

boho garland :: diy


sure, little triangle bunting garlands are cute, but maybe... just maybe a little too cute. today, i'm sharing with you another way to add some garland decor and it's all about using what you already have! for mine, i used lace, yarn, jewelry chain, dried flowers, feathers and more. i love the way it turned out and i think it adds a bit of gypsy style to the shop!

here's how i did it:

  1. decide on your main base. this should be a strong type of string (twine, burlap, yarn, leather, etc)
  2. tie loop knots at each end for hanging
  3. clip on your "found items" with clothespins before gluing on. this way you can get an idea of how each piece looks before you are committed.
  4. once you are happy with the spacing, simply use your glue gun to adhere.
  5. tip: use all sorts of textures in your garland. this will make the full piece extra interesting!

Wednesday, July 29, 2015

wonderful wednesday :: featured items


guess what! we rearranged the shop yesterday and put out quite a few new things! i hope you'll stop by soon to see them all. this week's featured items are:

  • an artistic terrarium lamp ($140)
  • little prints framed in silver ($20)
  • love you to the moon pallet art ($42)
  • original design tanks ($26)
  • layering bracelets ($15 each)

Tuesday, July 28, 2015

feather garland :: diy


friendly feather lovers unite!

last spring, my boys and i went on a hike by the lake. we found & collected absurd amounts of duck feathers. we even found an entire wing, which was weird and gross, but the boys didn't care. ever since, i've had an antique pitcher filled with feathers sitting in the guest room. i finally decided to put them to good use and made a garland.

these look adorable hanging from a fireplace mantel, above a window, over the dining table, etc. here's the details on how to make your own:

  1. head to a lake or pond and collect feathers. they will be plentiful.
  2. spray paint the ends with gold  - hell, spray paint the whole feather if you want! go crazy!
  3. i chose to hot glue 2 feathers in a criss/cross pattern before attaching to the string. 
  4. you can tie or hot glue to string
  5. hang and enjoy!

Tuesday, July 14, 2015

fabric state :: diy


state pride has long been a trend, but most recently it has taken a feminine turn. by using a fabric cut-out, the pattern options are endless! in the one above, i adorned the capital city (also the place i live), with a red, felt heart. this could be switched up as a star or exclamation point(!)

these little wall hangings make a cute gift for a newly married couple, or maybe a college student headed out of state. there are so many ways you can customize this idea... different states (or countries!), different colors, add a bit of lettering...

what would you do? here's the diy details to get you started:

you'll need:

  • scissors
  • print-out of your state shape (i just printed a google image outline)
  • fabric
  • fabric chalk or pencil
  • felt (optional)
  • hot glue & gun (not pictured)
  • matte board & frame

the steps:
  1. cut out the print out of your state. this can be tricky if your state has lots of crooked edges!
  2. lie your fabric face down on a flat service
  3. lie your cut-out face down on top of your fabric
  4. trace with fabric chalk or pencil. i used ink pen, which works too, but if your fabric is thin it may be visible from the right side.
  5. now cut along the shape you traced
  6. optional: add a felt shape that represents something inside your state shape. use hot glue to adhere.
  7. glue your cut-out(s) in place on your matte board and frame

be sure to post pics if you try this yourself! i'd love to see it!

Wednesday, June 24, 2015

wonderful wednesday :: featured items


it's a wonderful wednesday here at the shop, friends! we have some new & fun items in straight from the market on macarthur where they made their debut. i hope you'll stop in sometime soon for a visit!

this week's featured items:

  • a carnival canvas ($70)
  • 4th of july goodies (both apron & bottle caddy $28)
  • funny pencils! ($2)
  • a lovely vanity brush, perfect for clearing off powder & make-up ($18)
  • found-object wall hook ($12)

Wednesday, June 10, 2015

wonderful wednesday :: featured items


it's a wonderful wednesday here at the shop and we've got a few things to share with you!

this weeks featured items:

  • a mid-century modern dining set (table not pictured) ($850)
  • vintage linens ($2-8)
  • elephant bookends ($22)
  • mixed media original ($95)
  • baby taggie blankets ($16)

summer is in full swing! hope to see you all soon. xoxo

Wednesday, May 27, 2015

wonderful wednesday :: featured items


it's a wonderful wednesday friends and i have some new items to share with you from the shop!

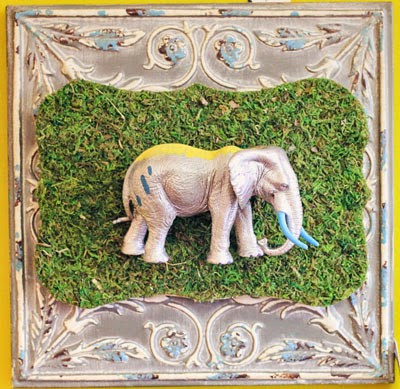
  • whimsical wall art on vintage ceiling tile ($60)
  • flower of the month drinking glasses ($38 for set of 12)
  • agate slice coasters ($22 each)
  • a pretty potted chair ($55)
  • a cheerful storage solution! ($65)

we hope to see you soon! xo

Wednesday, April 1, 2015

bunny butt garland :: diy


bunny butts. is there anything cuter?! celebrate spring by hanging this garland on your mantel, over a doorway, or above a kiddo's bed.

here's what you need:

  • white cardstock
  • decorative paper
  • scissors
  • round, decorative hole punch
  • glue
  • standard hole punch
  • twine or ribbon
  • pencil


the diy details:
  1. draw your bunny template on one piece of paper
  2. cut out, then trace on the rest of your white cardstock
  3. after all bunnies are cut out, punch out their little tails using the decorative hole punch
  4. glue tail on
  5. using a small standard hole punch, create holes at the top of each ear
  6. string through the twine